Making a simple API using AWS Lambda and API Gateway – PART 1

Serverless architecture gives us an easy way to stand up an API without having to worry about managing a server. Like most decision, the decision to use serverless comes with a host of pros and cons; experience is here, ultimately the best teacher.

Let’s make a simple API using AWS Lambda and API gateway services

If you haven’t yet, go sign up for a free AWS account. Many of the services have a free tier. You can run this example without any cost.

Let’s use the classic pet store API for an example. We will have the following GET endpoints:
/animals-for-adoption – gets a list of all animals that are available
/info/{animal-name} – gets the info for an animal by the animals given name

Lambda’s are event driven functions that run on Amazon’s infrastructure. They look like any other function in JavaScript. Let’s make a simple Lambda function that returns a list of available pets.

In your aws account, go to Lambda, then create function. Then select “Author From Scratch”. Enter a name for the function, I used getPetsList. Set NodeJS for the run time and click CREATE FUNCTION.
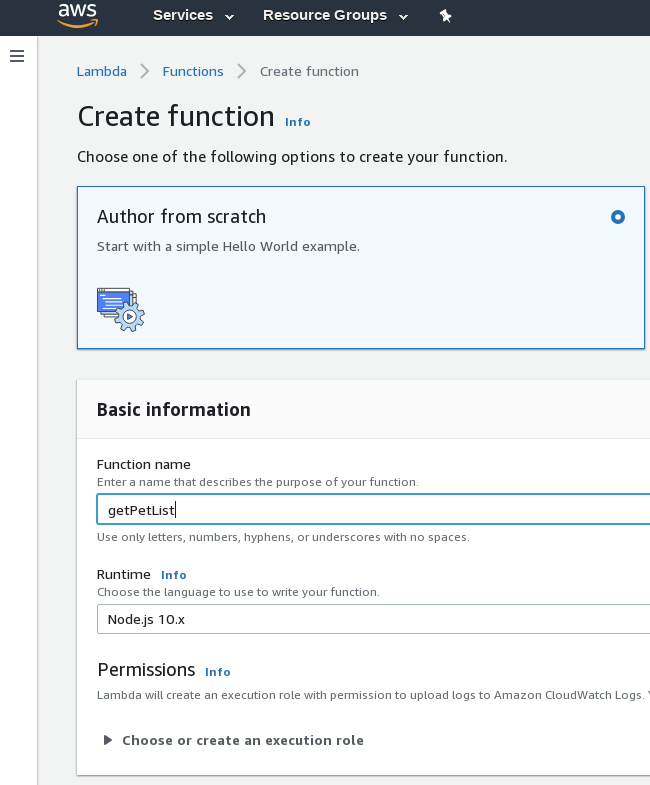
In a few seconds you should see the Lambda panel for your new function. AWS has provided an IDE so you can edit your function online.
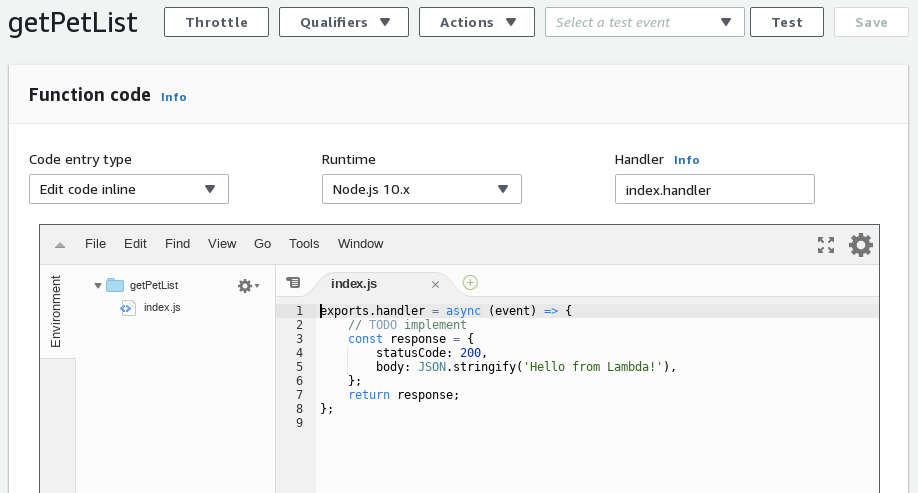
 

The Lambda is prepopulated with minimum boilerplate code. Here we can see that this file is actually a Node.js Module and it is “exporting” a function named handler. The handler function returns the response object.

exports.handler = async (event) => {
  // TODO implement
  const response = {
    statusCode: 200,
    body: JSON.stringify('Hello from Lambda!'),
  };
  return response;
};


Let’s go to API gateway panel in AWS and hook this up. Click through till you get to the create API page. Select the following options: REST, New API, Regional and give your API a name. Should look something like:
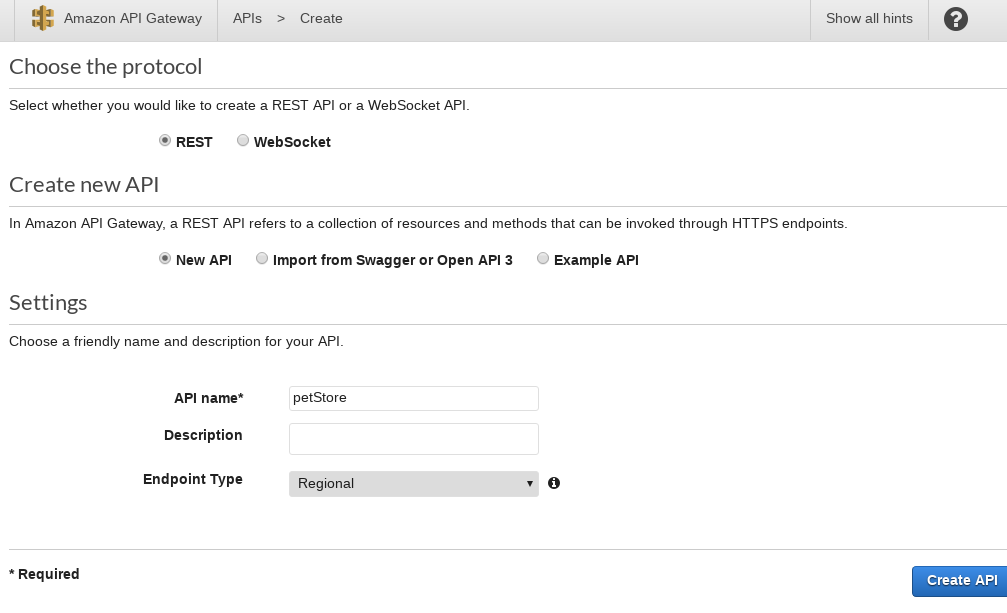
After clicking the CREATE API, you will now have an API with no endpoints. That’s not very useful so let’s add our getPetList endpoint. Click the “ACTIONS” button and select “Create Resource” from the drop down list.

From here you can create a new resource (endpoint) for your API. Let’s create our endpoint “/animals-for-adoption”.

Enter “Get Pets” for the Resource name, and “animals-for-adoption” for Resource Path. Click “Create Resource” button and you should now see your path in the resources list. However we still need to add a method; we will add a GET method to /animals-for-adoption. With “animals-for-adoption” selected, click the Actions button again, then “Create Method” then select GET from the list.

After you click the check-box you should see something like:
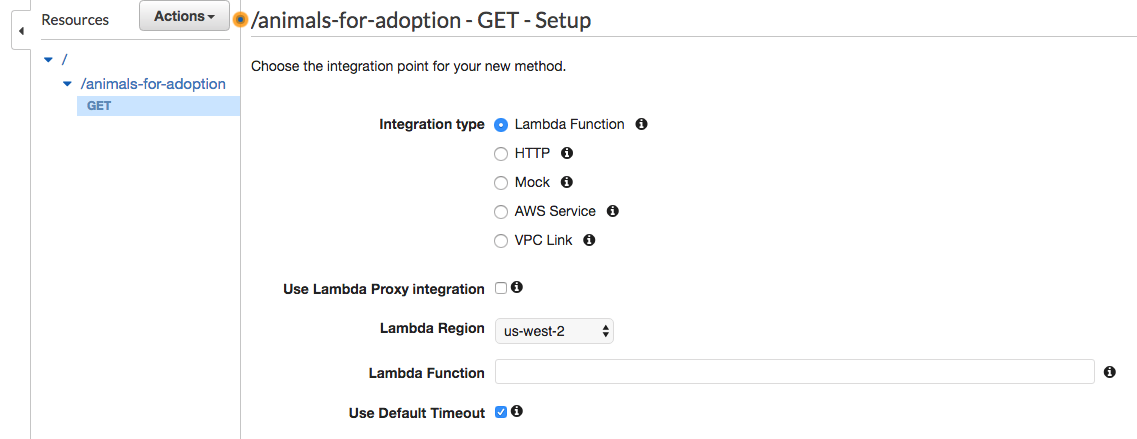
Since we are using a Lambda for our API backend, select Lambda and enter the name of the Lambda function in the input. Click save and then OK to set up the permissions automatically.

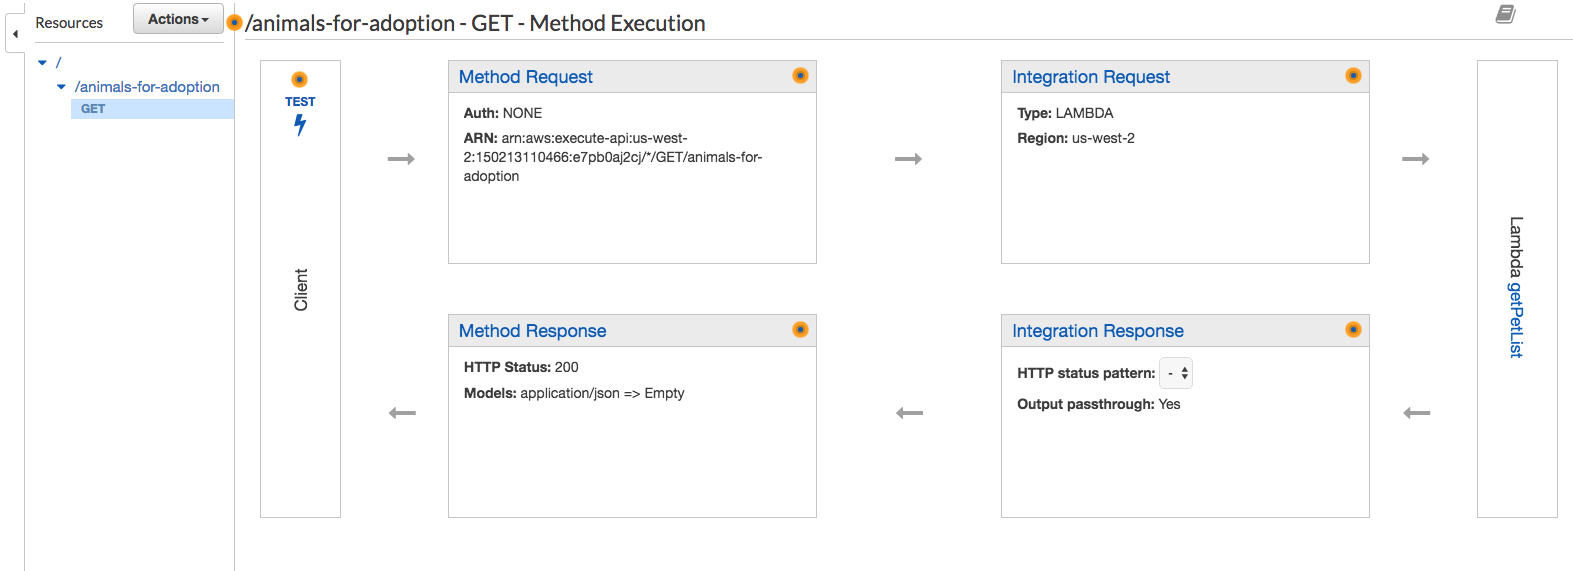
You should now see something like this:
Deployment is the last step. Once again click the “Actions” button. Look for the “Deploy API” option under applications. Clicking it produces a popup dialog:
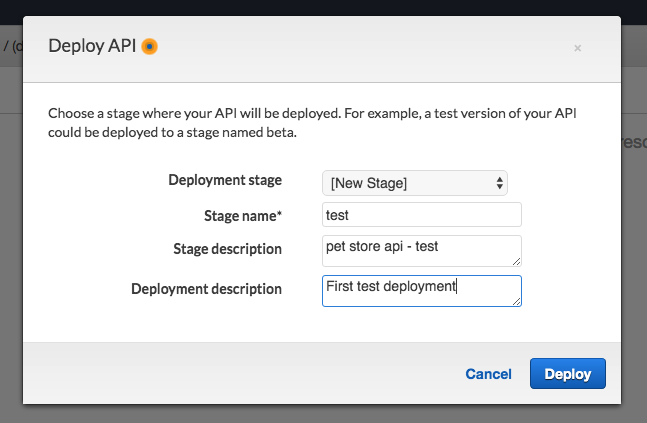
Fill it out like this and then click deploy.

After it deploys you should see an invoke url. In a browser, navigate to that url PLUS the endpoint /animals-for-adoption . You should get a response like:

{"statusCode":200,"body":"\"Hello from Lambda!\""}

You will need to update your lambda function to get the list of pets from the API, I will cover that in the next post.
Use Buttons and click events to run Javascript functions and code blocks

The previous post showed how to select and edit every paragraph element on a page adding a smiley face to each paragraph, but we run the code by entering it directly in the Javascript console. How can we run a section of JavaScript code when something happens? Often we want a section of JavaScript code to run when a button is clicked. Let’s see how that is done.

Note that I am ignoring some best practices for the sake of simplicity.

Let’s add a button to our page using, <button>CLICK ME</button>. When we click the button, nothing happens.

Let’s say you got here and want to follow these instructions, but don’t know how. You can edit, create, and run HTML / Javascript code and html sections at: https://codepen.io/pen/

Well that does nothing and is pretty boring, so let’s make it do something.

Starting simple let make the button trigger an alert. Change the button code to:
<button onclick="alert('You clicked the button')">CLICK ME!</button>
to get this:

If you click on the button, you should get an alert box.

Now let’s make a button to add 🙂 to the end of each paragraph.

From the previous post we have this section of code that appends 🙂 to the end of each paragraph on a website.

allPTags = document.getElementsByTagName('p'); // Gets all our p tags
for (let pTag of allPTags) { // Loops through each p tag
  pTag.append(' :) '); // Add :) to each P tag
}

Let’s take this code block and smash it inside our button.

<button onclick="
  allPTags = document.getElementsByTagName('p'); // Gets all our p tags
  for (let pTag of allPTags) { // Loops through each p tag
    pTag.append(' :) '); // Add :) to each P tag
  }
">CLICK ME FOR SMILES!</button>

OK, I know this is really ugly, but it’s simple and it will work! We can clean this up in a later post.

Here is the result:

Click away! You will see that every click adds more smiles to the page!

Using JavaScript to manipulate a webpage using tag names

This is a continuation on previous posts, Using JavaScript to Select HTML Elements, & How to use JavaScript to Interact With HTML Webpage. This will cover selecting HTML elements by tag names.

Note that I am ignoring some best practices for the sake of simplicity.

As a website loads, nodes (sections) of the page get loaded into the document object. The document object has methods that can be used to select, and manipulate the HTML page. Say we want to get all <p> tags on a website and add a smiley face to the end of each, how can we do that? The document’s method getElementsByTagName can fetch every <p> tag in a site and then we can modify each P element.

Let’s give this a try right now! Right click anywhere on this text (from a desktop / laptop) and then click Inspect from the popup menu. You should see a new window open somewhere. Inside this new window, open the console tab (See more instructions here). You can now run JavaScript code inside this console tab. In the blank area, to the left of the >, type or copy the following and then enter: document.getElementsByTagName('p').length You should see a number. That number is the total of <p> element on the webpage.

So back to adding a smiley face to the end of each paragraph.
Instead of jumping straight in, let’s do this gradually. Start by console.log each p tag:

allPTags = document.getElementsByTagName('p');
for (pTag of allPTags) {
console.log(pTag);
}

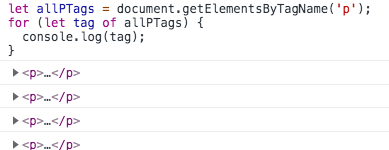
Now the output should look something like:

This is a list of all the <p> tags on the page. Now instead of console.log each of them, we can append (add) to them. We want to add a smiley face. Taking the same for loop and update it a little:

allPTags = document.getElementsByTagName('p'); // Gets all our p tags
for (let pTag of allPTags) { // Loops through each p tag
pTag.append(' :) '); // Add :) to each P tag
}

Go ahead and try it, it’s pretty funny. To undo it, just reload your page.

Next post will cover using a button to run the above code.

Need to learn more about HTML? Here is a good resource.